

Completing The Xplan SOA Request Form
Use this guide to complete an SOA Request in the iComply2 SOA Wizard.
By using the SOA Wizard to complete the Request Form, all data is entered directly into Xplan for a smooth information transfer between the adviser and the paraplanner.
Before Getting Started
If you haven’t entered the client data into the Fact Find Wizard in Xplan, provide the Fact Find to the paraplanner with your SOA Request documentation.
Completing The Wizard
Step 1: Create A New SOA Scenario

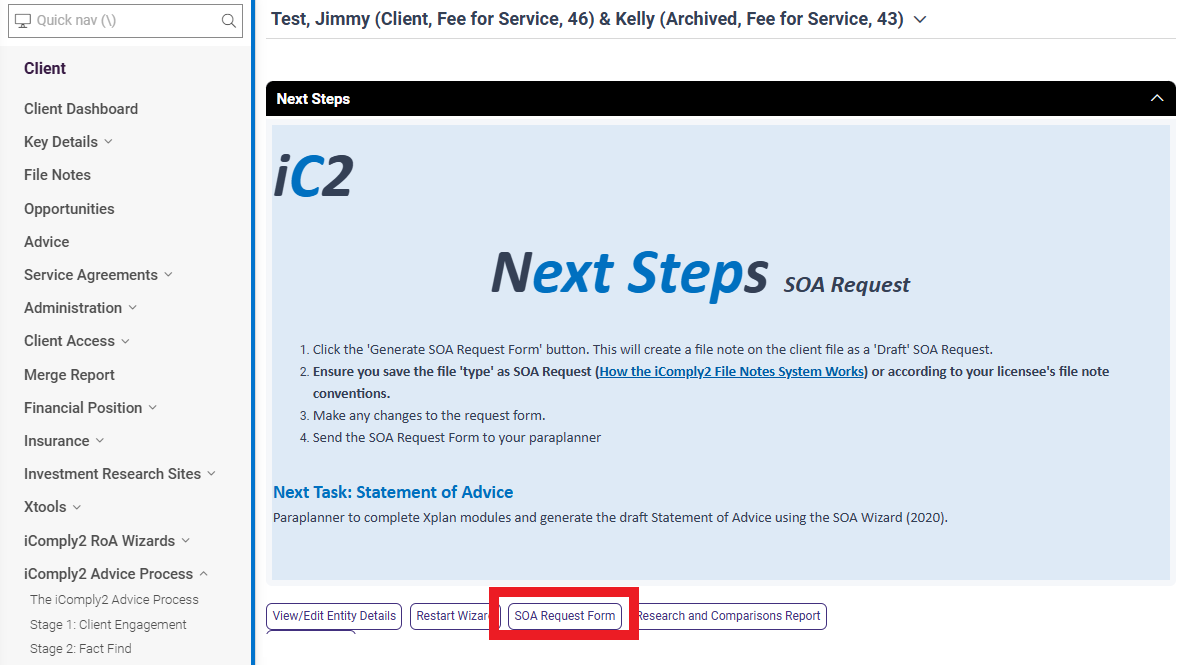
From the iComply2 Advice Process Wizard in Xplan, select Stage 4: SOA Wizard
In the SOA Wizard, create a new SOA Scenario
Step 2: Wizard Selection

From the Wizard Selection, choose ‘SOA Request Wizard’
Step 3: SOA Settings

Complete the SOA Settings.
If you have already completed the research and modules, you can let the paraplanner know which modules have been created, and link the scenario/s into the SOA Wizard.
Step 4: Review Client Details

Review the client details from the Fact Find.
Make sure that the client details including basic details, Risk Profile, Scope of Advice and Objectives are still up to date since the Fact Find was entered.
Completing The SOA Request Form
Step 5: Strategy Recommendations

From the Strategy Recommendations section, click the ‘Add’ button.

Complete the details of the recommended strategy. The order input will determine the order of the strategies in your SOA document.
It is important to link your strategy recommendation to an objective being satisfied. Where multiple strategies satisfy the one objective, the SOA document will link these strategies together in the Executive Strategy section.

You can write paraplanning notes in the strategy recommendation. This is where you can provide further context on your recommendation to the paraplanner.
Repeat this process for each recommended strategy
Step 6: Product Recommendations (Super & Investment Products)

Select the objective that in linked to your product recommendation.
It is important to outline what the client’s objective/s are when reviewing their product/s. This will help build the basis of your advice, and why the recommended product is appropriate for your client’s circumstances.

For either the client and/or the partner, click the ‘Add’ button to add a product recommendation.

Select the option to either:
Rollover the full balance
Partially rollover
Maintain your existing, or
Invest
Then select the relevant existing product, and the recommended product.
You can also write paraplanning notes explaining your recommendation.
Repeat this process for the Client and the Partner. Your paraplanning notes will provide detail for the paraplanner to complete the WealthSolver scenario.
Step 7: Insurance Recommendations

If you have completed a Risk Researcher scenario, there is no need to complete this section. Your Risk Researcher scenario data will pull into the SOA.
Alternately, you can provide Risk Researcher instructions for your paraplanner.
Step 8: Projections

If you have done Xtools+ scenarios, there is no need to complete this section.
Alternatively, provide detail on your projections for the paraplanner. You can include a Recommended scenario and up to 3 alternative scenarios. Provide the detail in the Paraplanning Notes
Step 9: Investment Strategy

Select where your Investment Portfolio recommendations have been picked
IPS
WealthSolver
Text
If your investment recommendations have been made in WealthSolver, you can select the scenario from the WS module
Step 10: Fee Disclosure

Select your Fee Disclosure inlcudingf any upfront Advice Preparation Fees, Brokerage Fees and Ongoing Advice Fees.

For any ongoing or fixed term agreement fees, pick the fee type, payment frequency and annualised fee amount
Step 11: Final Notes

Provide any final notes for your paraplanner (if required).
Step 12: Merge SOA Request Form
Merge the SOA Request Form for your paraplanner
Step 13: Create SOA Request to iC2 Projects App
Create a new SOA Request in iC2 Projects App to assign the job to your paraplanner. Click on the link below for instruction guide on creating a new SOA Request in the iC2 Projects App.
https://www.icomply2.com.au/ic2app-tips/creating-an-soa-request